In every image a photographer wrestles with the same elemental challenge: how to let the light behave just as intended. Exposure is the cornerstone of that battle, yet the techniques that truly give artists control over light are often underused. Masking, when executed with precision, is one of the most powerful tools to shape exposure on a frame-by-frame basis. This article explores the fundamentals of masking, the ways it can be combined with camera settings, and practical workflows that elevate both the creative and technical aspects of photography.
The Anatomy of Masking in Exposure Control
Masking refers to selectively blocking or altering light in certain parts of the scene during the exposure process. Think of it as a painter’s brush that only touches the canvas where the artist wants color. In photography, masks are created by physical means—such as translucent sheets or masks placed in front of the lens—or by digital manipulation in post‑processing. Each approach offers unique advantages:
- Physical masking works in real time, letting the photographer see the effect immediately.
- Digital masking provides flexibility, allowing fine‑tuned adjustments after the shot.
Common Physical Masking Techniques
When shooting, photographers often employ physical masks to split light across a subject. Below are three methods that are easy to set up and highly effective.
-
Transparency sheets – Placing a semi‑transparent sheet on the lens or in front of the subject can reduce exposure to specific areas. The sheet’s opacity can be varied to achieve graduated exposure.
-
Neutral‑density (ND) filters – ND filters block a set amount of light across the entire frame. By combining multiple ND filters or placing them partially over the lens, photographers can create a gradient or selectively shade sections.
-
DIY masks – Lightweight paper, cardboard, or even a translucent fabric can be cut to shape and positioned in front of the lens or on the subject to isolate light. The key is a stable support that prevents the mask from shifting during the exposure.
Integrating Masking with Camera Settings
Masking doesn’t replace traditional exposure controls; rather, it complements them. Understanding how to synchronize masks with aperture, shutter speed, and ISO is essential to prevent over‑exposure or under‑exposure in masked regions.
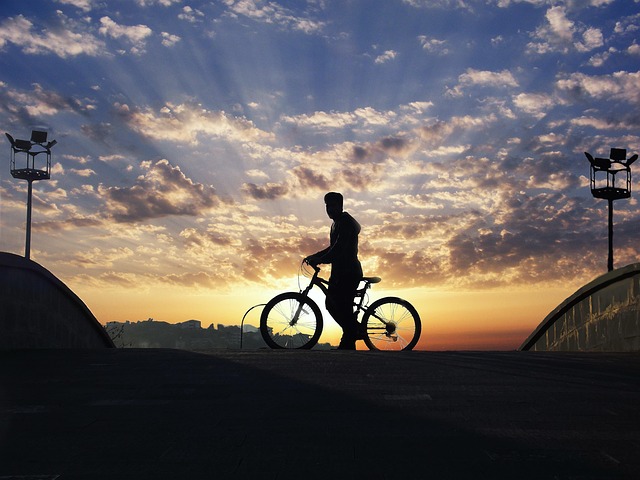
Consider a scenario where you’re photographing a sunrise behind a silhouette. The foreground requires a higher exposure to capture details, while the silhouette must stay dark. You can set a higher ISO to increase sensitivity, use a wide aperture to gather more light, and then employ a physical mask to block light from reaching the silhouette. This layered approach ensures both parts of the image are properly exposed without relying solely on dynamic range.
Step‑by‑Step Workflow for On‑Location Masking
“The real beauty of masking is that it lets you craft exposure in the moment.” – Anonymous Photographer
Here is a concise workflow that photographers can adopt when shooting on location.
-
Assess the scene. Identify areas that need exposure control and decide whether physical or digital masking is more practical.
-
Choose your mask. For quick shots, use a neutral‑density filter. For complex scenes, consider a custom‑cut paper mask.
-
Set base exposure. Adjust ISO, aperture, and shutter speed based on the overall brightness.
-
Apply the mask. Position it carefully, ensuring it covers only the intended area.
-
Take test shots. Use the camera’s histogram to verify that the masked region is within the desired exposure range.
-
Fine‑tune. If the masked area is still off, adjust the mask’s position or add another layer of ND filter.
-
Capture the final image. With the mask in place and exposure settings locked, you’re ready to shoot.
Digital Masking: The Post‑Processing Advantage
When on‑location masking isn’t feasible—perhaps due to time constraints or the need for subtle adjustments—digital masking steps in. Software like Lightroom, Capture One, or Photoshop allows photographers to create masks based on color, luminance, or edge detection. The process involves the following steps:
- Define the mask region. Use selection tools to isolate the area needing exposure correction.
- Adjust exposure locally. Increase or decrease brightness, contrast, or gamma within the mask without affecting the rest of the image.
- Blend edges. Apply feathering or gradient options to ensure a seamless transition between masked and unmasked regions.
Because the mask exists only in the digital file, it can be revisited and modified as many times as needed. This flexibility makes digital masking invaluable for complex scenes where light behaves unpredictably.
Practical Example: Street Portraits in Mixed Light
Suppose you’re photographing a subject under a street lamp while the background remains bathed in daylight. The subject’s face should be well lit, but the street lamp’s flare can wash out details if not managed.
-
Shoot in RAW. RAW files retain maximum dynamic range, giving you headroom for masking.
-
Create a luminance mask. In Lightroom, select the brightest areas (the street lamp) and create a local adjustment.
-
Reduce exposure on the lamp. Decrease the exposure slider by 1–2 stops, focusing on preserving the subject’s illumination.
-
Apply subtle contrast. Increase contrast slightly in the lamp area to maintain texture.
-
Fine‑tune feathering. Adjust the mask’s feathering to ensure the transition between lamp and background is natural.
The final result is a balanced image where the subject remains clear, the lamp adds atmosphere, and the background retains its natural brightness.
Advanced Masking Concepts for the Serious Photographer
While the basics of masking are straightforward, advanced users can push the technique further. Two concepts—composite masking and exposure blending—are worth exploring.
- Composite masking involves layering multiple masks, each addressing a different exposure issue. For instance, you might mask the sky separately from the foreground to apply a high‑contrast split‑tone effect.
- Exposure blending uses multiple exposure shots combined into a single image. By masking each exposure in different parts of the frame, you create a composite that has optimal exposure everywhere, effectively extending the dynamic range beyond what a single shot can capture.
These advanced techniques demand a higher level of skill and equipment but can produce truly spectacular results in challenging lighting environments.
Case Study: Landscape with a Dramatic Sky
A landscape photographer faces a scene where the sky is 6 stops brighter than the foreground. The goal is to retain detail in both.
-
Take three exposures. One for the foreground, one for the mid‑tone, and one for the sky.
-
Create masks. Use a luminance mask to isolate the sky in the third exposure.
-
Blend exposures. In Photoshop, align the layers, apply the sky mask, and set the layer mode to “Screen” for the sky layer. Use “Multiply” for the foreground.
-
Adjust final tone. Add a subtle gradient map to unify the overall color palette.
The resulting image showcases a balanced exposure that preserves the vividness of the clouds and the textures of the foreground, a testament to the power of masking.
Common Mistakes and How to Avoid Them
Masking is a subtle art, and small errors can undermine the entire exposure. Here are frequent pitfalls and their remedies.
- Inconsistent mask edges. Sharp edges can appear unnatural. Always feather or soften edges, especially when masks cross color gradients.
- Over‑masking. Adding too many masks can clutter the workflow and introduce noise. Keep the number of masks minimal and focused on the most critical exposure adjustments.
- Ignoring dynamic range. Masking should complement the camera’s dynamic range, not replace it. Use high‑quality sensors or dual‑exposure techniques when necessary.
- Neglecting color balance. Masks that affect luminance can inadvertently shift color balance. Verify white balance after each masking step, adjusting if needed.
Pro Tip: Build a Masking Workflow Checklist
Before each shoot, create a quick checklist:
- Identify areas requiring exposure control.
- Select mask type (physical or digital).
- Set base exposure settings.
- Apply mask and review histogram.
- Capture test shot and adjust as needed.
- Finalize and document mask settings for future reference.
Consistency in your process reduces errors and speeds up the shooting session.
Conclusion: The Art and Science of Masking for Exposure Control
Masking bridges the gap between the photographer’s vision and the technical realities of light. Whether you block sunlight with a custom paper mask or fine‑tune exposure in a RAW file, the core principle remains the same: selectively control how much light reaches each part of the image.
As camera sensors evolve and post‑processing software becomes more sophisticated, the importance of mastering masking does not diminish. Instead, it offers photographers a flexible toolkit to craft images that reflect their creative intent, regardless of lighting challenges. By integrating masking into both the shooting and editing stages, photographers can confidently navigate the complexities of exposure, ensuring that every photograph tells the story it was meant to convey.


