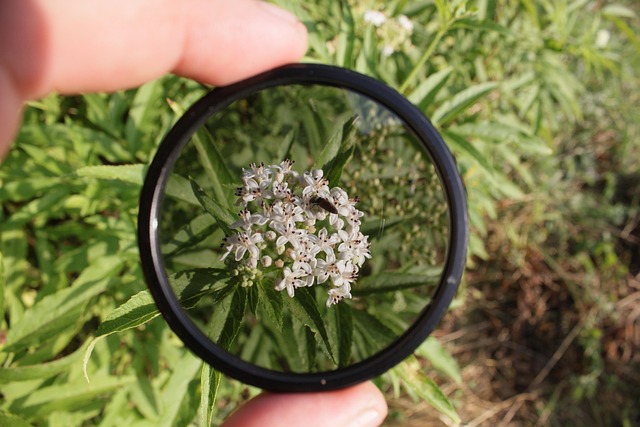
In the world of photography, exposure is the fundamental rule that determines how light reaches the sensor and, ultimately, how the image appears. Whether you are shooting a sweeping landscape or a candid portrait, mastering exposure means learning how to balance three core elements: aperture, shutter speed, and ISO. A Polar filter, while often associated with color correction and glare reduction, also plays a subtle yet powerful role in exposure management. By understanding how a Polar filter interacts with light, you can harness its benefits to create images that are both technically sound and visually compelling.
Understanding Exposure Basics
Exposure is the result of the interplay between the amount of light that hits the camera sensor and the camera’s ability to record that light. The exposure triangle—aperture, shutter speed, ISO—offers photographers control over this balance. Aperture determines the size of the lens opening; a larger opening (lower f‑number) allows more light in but reduces depth of field. Shutter speed governs how long the sensor is exposed to light; faster speeds freeze motion while slower speeds capture more light, useful for low‑light scenarios. ISO sets the sensor’s sensitivity to light; higher ISO settings amplify the sensor’s response, enabling shooting in darker environments but introducing noise.
- Aperture: Influences depth of field and brightness.
- Shutter Speed: Controls motion blur and light intake.
- ISO: Adjusts sensor sensitivity with a trade‑off in image noise.
When shooting with a Polar filter, these three parameters must be adjusted in harmony because the filter can alter the amount of light that reaches the sensor.
How Polar Filters Influence Exposure
A Polar filter functions by selectively blocking polarized light waves. In outdoor settings, sunlight is often partially polarized, which can cause glare on reflective surfaces and reduce color saturation. By rotating the filter, you can control the extent of this effect. However, because a Polar filter also attenuates a portion of the incoming light, it effectively increases the exposure value (EV). The amount of light loss depends on the filter’s grade—most common types reduce light by about one to two stops.
“A polarizer is essentially a filter that darkens the scene slightly while enhancing contrast and color fidelity. If you’re not mindful of this light loss, you might end up under‑exposing your images.” — LensCraft Photography Manual
Consequently, when you attach a Polar filter to your lens, you need to compensate for the reduced light either by widening the aperture, slowing the shutter speed, or raising the ISO. Each adjustment has its own creative implications, which can be used to your advantage or avoided depending on the desired outcome.
Practical Tips for Using a Polar Filter
Below are key steps to ensure your Polar filter enhances rather than hinders your exposure:
- Check the Light Reduction: Most Polar filters are rated with a number indicating light loss. A grade 0.3 filter reduces light by about 1.3 stops. Knowing this helps you pre‑adjust exposure.
- Use Exposure Compensation: Modern cameras allow you to dial in exposure compensation. When attaching a Polar filter, increase compensation by the filter’s stop loss to maintain the intended brightness.
- Re‑meter the Scene: After inserting the filter, take a test shot and review the histogram. Adjust settings until the histogram shows a balanced exposure without clipping highlights or crushing shadows.
- Plan for Color Shifts: Polar filters can alter the perceived hue of the scene. Use the filter to either intensify colors in a landscape or to neutralize overly saturated skies.
- Consider Lens Compatibility: The filter’s diameter must match the lens’s front element. Incompatible sizes can lead to vignetting or improper fit, affecting both exposure and image quality.
By integrating these steps into your workflow, you can harness the full potential of a Polar filter without compromising on exposure accuracy.
Balancing Light and Color
One of the most celebrated benefits of a Polar filter is its ability to suppress glare and reflections, thereby revealing hidden details in water bodies, glass, and wet surfaces. When glare is removed, the contrast between light and dark areas increases, which can lead to a more dramatic image. However, this heightened contrast also demands careful exposure control. Over‑exposing the bright areas can cause loss of detail, while under‑exposing the shadows may create a flat look.
Color saturation is another dimension affected by Polar filters. The filter tends to deepen blues and greens while flattening reds and yellows. This can be a creative asset—for instance, emphasizing the cool tones of a lake during sunrise—or a challenge when you need accurate color reproduction. Using a Polar filter in combination with white balance adjustments or color grading in post‑processing can mitigate unwanted shifts.
Common Mistakes and How to Avoid Them
Despite its advantages, the Polar filter is often misused, leading to suboptimal images. Below are frequent pitfalls and corrective measures:
- Ignoring Light Loss: Some photographers forget that a Polar filter reduces light, resulting in under‑exposed images. Always recalculate your exposure settings when attaching a filter.
- Over‑Rotating the Filter: Rotating a filter too far can completely eliminate glare but also darken the scene excessively, creating harsh shadows. Test different angles to find the sweet spot.
- Using the Wrong Filter Grade: A higher grade filter may be unnecessary for mild glare and can overly darken the image. Match the filter grade to the intensity of the light in your scene.
- Neglecting Lens Coatings: Some lenses have built‑in anti‑reflection coatings that perform a similar function to a Polar filter. Adding both can introduce unwanted artifacts.
- Forgetting Post‑Processing Adjustments: Even with perfect exposure in-camera, the filter’s effect on color and contrast can be subtle. Use post‑processing tools to fine‑tune hue, saturation, and contrast.
Advanced Techniques and Creative Uses
Once you master the basics, a Polar filter opens doors to more experimental approaches. Here are a few advanced concepts:
- Polarized Time‑Lapse: Combining a Polar filter with slow shutter speeds can yield dramatic skies with reduced glare and enhanced cloud movement.
- HDR Integration: In high dynamic range workflows, use a Polar filter during bracketed exposures to manage reflection and saturation consistently across all shots.
- Infrared Photography: Some Polar filters can be adapted to block certain wavelengths, offering unique possibilities in infrared image capture.
- Creative Glare Manipulation: Intentionally over‑polarize reflective surfaces to produce striking light streaks or to isolate specific elements like a glass window.
- Environmental Portraits: Use a Polar filter to soften harsh sunlight on a subject’s skin while preserving the natural background.
These techniques demonstrate that the Polar filter is more than a practical tool—it is a creative instrument that, when used thoughtfully, can transform ordinary scenes into extraordinary images.
Conclusion
Exposure remains the cornerstone of photographic mastery. By understanding how a Polar filter interacts with the exposure triangle, photographers can both preserve the technical integrity of their images and unlock new artistic possibilities. Remember that every filter introduces a trade‑off—whether it’s a slight reduction in light, a shift in color, or a change in glare. The key is to anticipate these changes, adjust your settings accordingly, and use the Polar filter as a deliberate tool in your creative arsenal. With practice, you’ll find that mastering exposure with a Polar filter becomes an intuitive part of your shooting process, enabling you to capture scenes with clarity, color, and impact that stand the test of time.


