When a photographer talks about the “speed” of an exposure, the term that usually comes to mind is closing speed. This refers to how quickly a camera’s shutter opens and then closes to expose the sensor. Mastering this element is essential for producing sharp, crisp images that capture motion without blur.
What Is Closing Speed?
Closing speed, sometimes called shutter speed, is the length of time the shutter stays open. It’s expressed in fractions of a second (e.g., 1/500, 1/60) or, less commonly, in full seconds for very long exposures. A faster closing speed means less light reaches the sensor, while a slower speed allows more light and can capture movement over time.
The Exposure Triangle Revisited
Closing speed is one arm of the exposure triangle, joined by aperture and ISO. Together, they control the amount of light and the depth of field in an image. Adjusting one parameter usually requires compensating changes in the others to maintain a balanced exposure.
- Aperture: Determines how wide the lens opens. Wider apertures (smaller f‑numbers) let in more light and create a shallow depth of field.
- ISO: Adjusts the sensor’s sensitivity to light. Higher ISO values allow for faster closing speeds but can introduce noise.
- Closing Speed: Controls motion blur and the total amount of light captured.
How Closing Speed Affects Motion
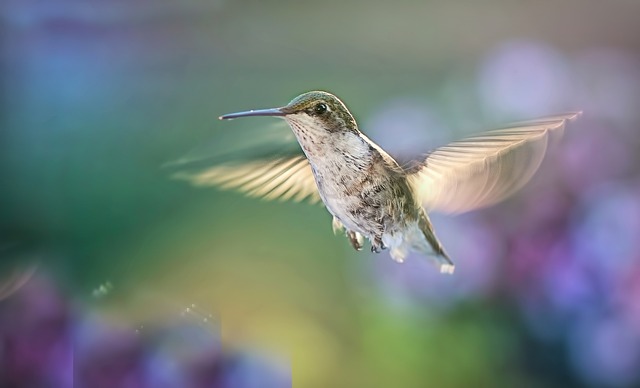
One of the most visible impacts of closing speed is on motion representation. A very quick shutter can freeze rapid movement, such as a bird in flight or a splash of water, while a slower shutter can blur that motion to convey speed or create artistic streaks.
“Fast closing speeds are the photographer’s fastest friend when capturing high‑speed subjects.” – Nikon Technical Manual
Physics Behind the Shutter
In most digital cameras, the shutter is an electronic component that physically opens and closes or uses a sensor‑level gate. Mechanical shutters consist of two curtains that move across the sensor. The time between the first curtain passing and the second curtain closing is the closing speed. Understanding this mechanical sequence helps photographers predict how motion will be captured.
Choosing the Right Closing Speed
Deciding on a closing speed depends on your subject and creative intention. Here are some guidelines:
- Still Life and Portraits: 1/125 to 1/200 sec is typically sufficient to avoid camera shake while keeping a natural look.
- Action Sports: 1/500 sec or faster to freeze athletes in motion.
- Night Photography: Long exposures (seconds to minutes) with a tripod and low ISO.
- Creative Blur: 1/30 sec or slower to introduce motion streaks.
Camera Shake and the 1/60 Rule
When shooting handheld, a general rule is to use a closing speed at least as fast as the reciprocal of the focal length. So for a 200‑mm lens, aim for 1/200 sec. This helps counteract minute movements of the camera body that can otherwise blur the image.
Gear That Influences Closing Speed
Several camera components affect the achievable closing speed:
- Mirror‑less vs. DSLR: Mirrorless cameras can often reach higher shutter speeds because they lack a mirror slap.
- Electronic Shutter: Some models use an electronic shutter that can reach speeds beyond the mechanical limit but may introduce rolling‑shutter distortion.
- Lens Speed: Faster lenses (e.g., f/1.4) allow more light, letting you use quicker closing speeds in low‑light conditions.
Practical Tips for Faster Closing Speeds
To capture sharp images in challenging light, try these strategies:
- Increase ISO gradually to boost sensor sensitivity.
- Switch to a lens with a wider maximum aperture.
- Use burst mode to increase the chances of a clean frame.
- Set the camera to “shutter priority” mode to automatically adjust aperture.
Creative Uses of Slow Closing Speed
While most photographers aim to freeze motion, slow closing speeds open a world of creative possibilities. Here are a few techniques:
- Light Painting: In low light, manually move a light source while the shutter stays open for several seconds.
- Long Exposure Waterfalls: Use 15‑30 sec exposures to soften water and create a silky effect.
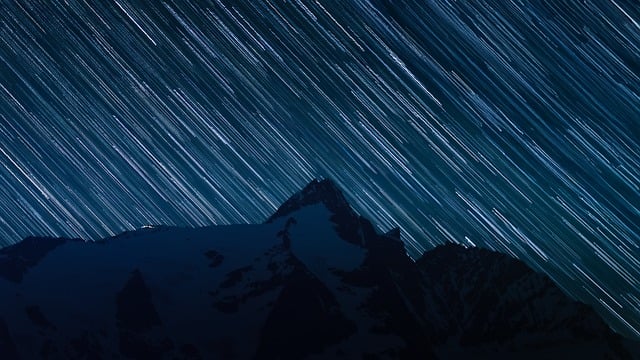
- Star Trails: Expose for hours to capture the apparent motion of stars.
Mitigating Noise in Long Exposures
Long exposures can introduce ISO noise. Counteract this by using a tripod, setting ISO to the lowest possible value (often ISO 100 or 200), and employing exposure bracketing to combine images and reduce noise through software.
Advanced Shooting Modes
Many modern cameras offer modes that automate the selection of closing speed based on conditions:
- Auto Mode: The camera chooses aperture, ISO, and shutter speed.
- Program Mode: The camera sets shutter speed and aperture, but the user can shift the exposure compensation.
- Shutter Priority Mode: The photographer sets closing speed while the camera adjusts aperture.
Mastering these modes can greatly improve your workflow, especially in fast‑changing environments.
Simulating High-Speed with Fast Closing Speed
When a subject is too slow to freeze with a realistic shutter speed, photographers sometimes shoot in “burst” mode and select the sharpest frame. Some cameras can record thousands of frames per second, but these are typically only available in high‑end cinema cameras.
Evaluating Your Exposures
After taking a photo, check the histogram to ensure proper exposure. If you see a clipping of highlights or shadows, adjust your closing speed or other exposure settings. A well‑balanced histogram often correlates with a clear, sharp image.
Using a Remote Shutter Release
To further reduce camera shake, especially at very slow closing speeds, use a remote shutter release or the camera’s built‑in timer. This eliminates the vibration that occurs when pressing the shutter button.
Practical Exercises to Improve Closing Speed Skills
- Freezing Sports: Shoot a fast‑moving ball at various shutter speeds (1/500, 1/1000, 1/2000) to see the difference.
- Long Exposure Light Trails: Set the camera to 10‑second exposure with a tripod, and walk a flashlight around the frame.
- Portraits in Low Light: Try aperture priority mode with a wide aperture, then lower the ISO to see the impact on closing speed.
- Macro Freeze: Capture a buzzing bee at 1/8000 sec to practice extreme shutter speed limits.
Recording and Reviewing Results
Keep a log of your settings and the resulting images. Over time, you’ll notice patterns that help you make instant decisions on closing speed in the field.
Conclusion
Mastering closing speed is more than a technical skill; it’s a creative tool that shapes the narrative of your photographs. By understanding how shutter speed interacts with aperture, ISO, and your gear, you can control motion, light, and sharpness with confidence. Practice consistently, analyze your results, and let the rhythm of the shutter guide your visual storytelling.