Light painting is a creative process that marries long‑exposure photography with intentional illumination. By guiding a light source across the frame while the camera’s shutter stays open, you leave a deliberate trail of light that can transform a simple scene into a dynamic work of art. This technique invites experimentation, demands patience, and offers a practical way to infuse your images with motion, color, and narrative. Whether you’re a hobbyist with a point‑and‑shoot or a professional working on a studio set, mastering light painting unlocks a new dimension of visual storytelling.
Fundamentals of Long‑Exposure Photography
Before you begin moving a flashlight or LED, it’s crucial to understand the mechanics of long‑exposure photography. In a standard exposure, the camera’s shutter opens for a fraction of a second, capturing light that has fallen on the sensor during that brief moment. In contrast, a long exposure keeps the shutter open for several seconds, minutes, or even hours, allowing light to accumulate over time. The result is an image where the light you add during that period becomes permanently etched into the photo.
Key concepts to grasp include:
- Shutter speed – the duration the shutter stays open.
- ISO sensitivity – how responsive the sensor is to light.
- Aperture – the lens opening that controls depth of field and light entry.
When shooting light painting, you typically set a very low ISO (100–200) to minimize noise, choose a narrow aperture (f/8–f/16) for depth of field, and then adjust shutter speed to the time it will take to complete your light pattern.
Choosing the Right Equipment
While light painting can be done with a basic digital camera, certain gear can make the process smoother and more flexible.
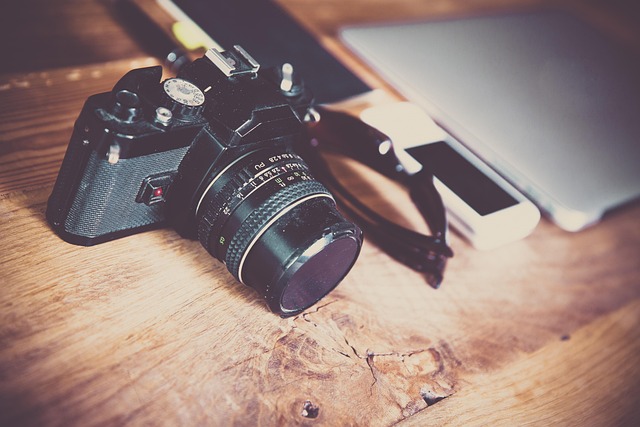
Camera and Lens
A DSLR or mirrorless camera with manual controls is essential. The camera should support manual focus, manual exposure, and the ability to use a remote trigger or timer to prevent camera shake.
Tripod
A sturdy tripod is non‑negotiable. It keeps your frame stable during long exposures and allows you to lock the camera in place so you can focus on manipulating light.
Light Sources
Common choices include LED flashlights, hand‑held LED panels, fiber‑optic pens, and even battery‑powered glow sticks. The choice depends on desired color, intensity, and movement. For vibrant colors, LED panels with color filters or built‑in RGB modes are ideal.
Accessories
- Remote shutter release – eliminates camera shake when you press the button.
- Light guides or diffusers – soften harsh light or direct it along a specific path.
- Battery packs – ensure your light source stays on for long sessions.
Planning Your Light Painting Session
Every great image begins with a plan. Sketch out the scene, determine how many light trails you want, and decide on the colors you’ll use. Consider the following steps:
- Identify the subject or backdrop you want to illuminate.
- Mark key points on the ground or on a sheet of paper to guide your hand.
- Decide on the direction of motion: forward, backward, circular, or diagonal.
- Choose a color palette that complements the scene’s mood.
- Test the light source in a smaller area to gauge intensity.
Remember that the light’s trajectory will be recorded in the final image; even minor deviations can produce unexpected results, which can be either a flaw or an artistic element.
Executing Light Painting Techniques
Basic Hand‑Held Light Painting
The simplest approach is to hold a light source and move it across the frame while the shutter is open. Start with a short exposure (e.g., 5–10 seconds) and adjust the length based on how far the light travels. Practice smooth, steady movements; jitter can introduce grainy streaks.
“The most striking light paintings often come from an unplanned hand motion—your body’s natural rhythm can become the secret ingredient.”
Using a Light Guide
Attach a diffuser or a piece of translucent material to your light source. This creates a softer glow and can produce continuous curves or gradients that resemble ribbons of light.
Multiple Light Sources
For complex compositions, synchronize several lights. This might involve using two or more LEDs, each with a distinct color. You can either hand‑paint with each light sequentially or have multiple photographers coordinate simultaneous movements.
Light Painting in Motion
If you want to capture movement—such as a person dancing or a vehicle passing—use a moving tripod or a gimbal to follow the subject. This adds an additional layer of motion to your light trails.
Composition and Design Considerations
Even though light painting introduces deliberate illumination, the overall image still relies on compositional principles. Here are some guidelines:
- Rule of thirds – place key light elements along the intersecting points.
- Leading lines – use the light’s path to guide the viewer’s eye.
- Balance – distribute light and darkness evenly unless a dramatic contrast is intended.
- Negative space – allow areas of stillness to frame and emphasize the moving light.
Color harmony is also crucial. Complementary colors can make the light pop, while analogous hues create a subtle, cohesive look.
Post‑Processing Light Painting
After you’ve captured your long exposure, the final image often requires refinement. Digital editing can enhance color, contrast, and overall impact.
Basic Adjustments
- Exposure and brightness – ensure that the background and light trails are balanced.
- Contrast – increase to sharpen the distinction between light and shadow.
- Saturation – boost color intensity, especially for vibrant LEDs.
- Clarity – add detail to the subject if necessary.
Advanced Techniques
For more dramatic effects, try these:
- Layer masks – isolate specific light trails and apply different color grading.
- Noise reduction – keep the fine texture of long exposure without excessive grain.
- Selective color – adjust the hue of individual light colors while preserving others.
- Vignette – subtly darken edges to focus attention on the central light.
Troubleshooting Common Issues
Even experienced photographers encounter problems. Below are frequent obstacles and solutions.
Unwanted Motion Blur
If the subject or camera moves during the exposure, the image can become blurred. Use a stable tripod, a remote shutter, or increase ISO slightly to shorten exposure time.
Uneven Exposure
Bright spots or overexposed areas often arise from inconsistent light intensity. Test the light source before shooting, and consider using neutral density filters to control exposure.
Noise in Long Exposures
Lowering ISO reduces noise but may require longer exposure times. If noise persists, shoot in RAW format and use noise reduction software in post‑processing.
Difficulty Controlling Light Path
To ensure precise motion, use a light guide or a pre‑planned path marked on a surface. A metronome or rhythm can help maintain consistent speed.
Expanding Your Light Painting Horizons
Once comfortable with basic techniques, you can explore more sophisticated ideas.
Color Mixing on the Fly
Blend multiple light sources of different colors to create gradients or custom hues. Adjust the intensity of each LED in real time to achieve a dynamic spectrum.
3D Light Sculpting
Use a small tripod or a fixed frame to paint light in three dimensions. By moving the light source above a subject, you can create holographic or volumetric effects.
Night‑Sky Light Painting
Combine light painting with astrophotography. Capture stars in a long exposure, then overlay hand‑painted trails to create a surreal, cosmic scene.
Collaborative Light Painting
Invite friends or a crew to paint simultaneous light paths. This turns the session into an interactive performance and opens up complex patterns that are difficult to achieve alone.
Final Thoughts
Light painting is more than a novelty; it’s a disciplined practice that deepens your understanding of light, exposure, and composition. By mastering the fundamentals, experimenting with equipment, and embracing creative storytelling, you can transform ordinary moments into luminous narratives. Keep experimenting, refine your technique, and let the glow of your own creativity shine through each shot.