Capturing the energy of a live performance is a challenge that sits at the intersection of photography, optics, and the fleeting nature of concert lighting. Whether you are shooting an intimate acoustic set or a full‑scale arena show, the goal remains the same: translate the light, the mood, and the motion into a photograph that feels as alive as the event itself. This article walks through the practical steps and creative decisions that allow a photographer to master camera optics for stage shots, focusing on the interplay between exposure, focal length, and the dynamic palette of concert lighting.
Understanding the Anatomy of Concert Lighting
Concert lighting is far more than a backdrop for performers; it is an orchestrated narrative device that guides the audience’s attention, amplifies emotion, and even shapes the visual storytelling of the show. Professional lighting designers use a combination of moving heads, LED arrays, spotlights, wash lights, and gobos to create depth, contrast, and color temperature variations. For a photographer, this complexity translates into a series of decisions about how to handle high dynamic range, color shifts, and rapidly changing intensity.
- High Dynamic Range (HDR): The stark contrast between bright spotlights and dim stage corners requires careful exposure control to avoid blown highlights or crushed shadows.
- Color Temperature Variation: LED systems can switch between warm amber, cool blue, or vibrant color palettes mid‑song, challenging white balance settings.
- Motion and Blur: Moving lights create trailing effects; a photographer can either freeze this motion or capture its fluidity, each approach telling a different story.
Choosing the Right Lens for the Stage
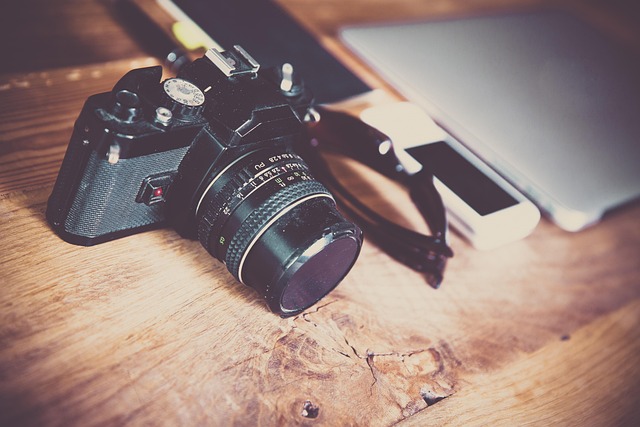
The lens you pair with your camera is perhaps the most crucial tool in your arsenal for stage photography. Here are the key considerations when selecting optics for concert lighting situations:
“The lens is the bridge between the world and the sensor; in high‑contrast environments like a concert, its characteristics can make or break the final image.”
- Focal Length: A 24–70mm zoom is a versatile choice for most venues, allowing you to move between tight headshots and wider environmental shots without changing gear. For large arenas, consider a 50–135mm zoom or even a telephoto prime to compress the scene.
- Maximum Aperture: Fast lenses (f/2.8 or lower) provide better low‑light performance and can create pleasing bokeh in the backdrop. However, the depth of field must be managed carefully to keep the performers in focus.
- Image Stabilization: Optical or sensor‑based IS helps mitigate camera shake in low‑light settings, especially when you are shooting handheld.
Exposure Strategy in Rapidly Changing Light
One of the most common pitfalls for stage photographers is getting locked into a single exposure setting that becomes unsuitable as the show progresses. Here are techniques to maintain optimal exposure throughout the concert:
- Use Manual Mode: Rely on the camera’s manual controls to adjust ISO, shutter speed, and aperture in real time.
- Set a Base ISO: Start with ISO 400–800 to balance noise with dynamic range. Increase only when the light drops significantly.
- Keep Shutter Speed Fast: A speed of 1/125s or faster freezes motion and reduces motion blur from dancers and stage lights.
- Adjust Aperture as Needed: A narrower aperture can help with depth of field, but watch for diffraction effects.
Many photographers employ exposure bracketing or use a handheld light meter to monitor changes. The goal is to capture the full tonal range without sacrificing detail.
White Balance and Color Management
Concert lighting often incorporates shifting color temperatures, from warm spotlights to cool LED washes. Managing white balance is therefore essential to preserve the intended mood:
- Custom White Balance: When possible, take a gray card in front of the stage under typical lighting to set a custom WB that reflects the actual color mix.
- Use RAW Format: Shooting in RAW preserves the color information and gives you greater flexibility to adjust WB in post‑processing.
- Be Creative with Color: While accuracy is important, you can also experiment with slight color shifts to match the performance’s emotional tone.
Lighting Techniques to Enhance Stage Photography
Beyond simply capturing what the lights already provide, photographers can use the available lighting creatively to add drama and depth:
- Fill Light with Reflectors: If the venue allows, bring a lightweight reflector to bounce light onto the performer’s face, reducing harsh shadows.
- Backlighting for Silhouettes: Position yourself slightly behind the performer and let the stage lights create a dramatic silhouette, especially effective in the climax of a song.
- Use Gobo Patterns: If the venue uses gobos to project patterns on the floor or walls, frame them in your composition to add texture and context.
Post‑Processing Workflow
The final polish of a concert photograph often happens in the darkroom—now, in the digital workspace. A structured workflow ensures consistency and quality:
- Import and Organize: Use a consistent naming convention and tag images with event details.
- Initial Calibration: Apply camera profile correction to ensure color accuracy.
- Exposure and Contrast Adjustments: Use the histogram to balance highlights and shadows.
- Noise Reduction: Apply selective noise reduction, especially around high‑ISO areas.
- Color Grading: Subtly adjust hues to reflect the concert’s mood, possibly using LUTs or adjustment layers.
- Sharpening and Export: Sharpen for the medium of distribution (print, web) and export in appropriate file formats.
Practical Tips for On‑Site Success
Every concert presents unique constraints—crowd density, limited shooting angles, and strict venue policies. Here are practical strategies to navigate these challenges:
- Scout the Venue: Arrive early to assess potential camera angles, signal points, and where lighting cues may obscure your view.
- Communicate with Stage Crew: Building rapport with lighting and stage managers can grant you access to preferred shooting spots and cue notifications.
- Use a Lightweight Tripod or Monopod: Stabilization helps when you need to shoot from a fixed position, especially in low light.
- Respect Attendees: Keep your camera low and avoid blocking sightlines. A discreet stance keeps the experience authentic for the audience.
- Carry Backup Gear: A spare battery, memory card, and lens ensure you’re ready for any unexpected change.
Capturing the Emotional Core
Technical mastery is only part of what makes a great concert photograph. The ability to convey the performer’s energy, the audience’s enthusiasm, and the atmosphere created by concert lighting transforms a well‑exposed image into a memorable story:
- Freeze a Signature Moment: Identify the climactic point of a song—perhaps a guitar solo or a call‑and‑response with the crowd—and capture the intensity.
- Include Environmental Cues: Show the venue’s size, the crowd’s reaction, and the interaction between performers and lighting.
- Use Depth of Field Wisely: Blur the background slightly to focus on the performer, yet keep enough context to ground the scene.
Conclusion: Harmonizing Light, Lens, and Emotion
Mastering camera optics for stage shots is a blend of technical knowledge, creative intuition, and an understanding of concert lighting as a narrative tool. By selecting the appropriate lens, managing exposure and white balance in a dynamic environment, and applying thoughtful post‑processing, photographers can translate the fleeting brilliance of live performance into timeless images. The next time you step into a venue, remember that each beam of light, each reflection, and each motion blur carries a story waiting to be captured through the right optics and a steady hand.