Lighting is the invisible hand that shapes every photograph. While composition, exposure, and camera settings often take the spotlight, the true artistry lies in the deliberate manipulation of light. In the realm of camera optics, mastering light design means understanding how to harness, control, and transform illumination so that each frame tells a story with depth, emotion, and clarity. Whether you’re shooting portraits in a studio, capturing the raw texture of a landscape, or experimenting with experimental light painting, a keen grasp of light design transforms an ordinary image into a memorable work of visual storytelling.
The Fundamentals of Light Design
Before diving into advanced techniques, it’s essential to revisit the basics that underpin all successful light design: source, direction, quality, and color. A light source can be natural or artificial; each behaves differently when it encounters the lens, subject, and surroundings. Direction dictates how the light interacts with surfaces, shaping shadows and highlights. Quality—whether the light is hard or soft—determines the sharpness of shadows and the overall tonal range. Color, influenced by the light’s temperature and any diffusion materials, sets the mood and can dramatically alter the perceived atmosphere.
- Source: Sun, LED panels, tungsten bulbs, or a humble desk lamp. The spectrum and intensity of the source set the foundation for your image.
- Direction: High, low, side, back, or front lighting each produces distinct visual effects.
- Quality: A hard light creates crisp edges, while a soft light melts transitions, softening skin and adding depth.
- Color: Warm light (yellow/red hues) exudes comfort; cool light (blue/green tones) feels tranquil or clinical.
Choosing the Right Equipment for Light Control
The gear you use to manipulate light can make a difference between a flat composition and a dynamic tableau. Below is a concise rundown of essential tools that empower photographers to shape light effectively.
- Light Modifiers: Softboxes, umbrellas, and diffusers soften harsh daylight or studio flashes. Reflectors bounce light back onto the subject, filling shadows without adding new light.
- Gels and Filters: Color gels can shift the hue of a light source, while neutral density filters reduce intensity, giving you more control over exposure settings.
- Control Bars and Flags: These accessories block unwanted spill or sculpt light into precise shapes.
- Portable Light Sources: LED panels with adjustable color temperature or battery‑powered flashes give you flexibility on the go.
- Camera Lens Choice: Fast lenses (low f-number) allow more light in, facilitating softer lighting or motion blur; prime lenses often provide the sharpest rendition of your crafted light.
Lighting Setups That Tell a Story
While the science of light is universal, its application is deeply personal. Below are three timeless lighting setups that have been refined over decades, each offering a distinct narrative capability.
1. Rembrandt Lighting – The Classic Portrait
This setup positions a key light at about a 45‑degree angle to the subject, slightly above eye level. The result is a small, sharp triangle of light on the cheek opposite the light source. The interplay of shadow and highlight defines facial contours, lending a dramatic, timeless look that has been the hallmark of portraiture for centuries.
“Rembrandt lighting isn’t just about a triangle of light; it’s about the conversation between shadow and illumination, mirroring the human soul.”
2. Split Lighting – Bold and Emotive
In split lighting, the key light falls directly on one side of the subject, while the other side remains in shadow. This stark contrast can amplify emotion, making the subject appear mysterious, serious, or powerful. The effect is most pronounced when used with hard lights or a narrow beam of light.
3. Loop Lighting – The Everyday Natural Look
Loop lighting, a hybrid of Rembrandt and a softer key light, places the light source slightly below eye level, creating a small shadow that loops from the nose to the cheek. It is forgiving, flattering, and often used for environmental portraits or everyday shooting where a natural feel is desired.
Advanced Techniques for the Experienced Photographer
Once you master basic setups, it’s time to experiment with more complex methods that push the boundaries of creative light design.
- Light Painting: Using a long exposure combined with handheld light sources, you can trace shapes or write words directly into your image. This technique blurs the line between photography and drawing, creating surreal, kinetic visuals.
- Multi‑Source Color Blocking: By placing multiple lights with different color temperatures or gels, you can create vibrant color zones that highlight textures or direct the viewer’s eye. This approach is popular in fashion and product photography.
- Reflective Backdrops: Reflective surfaces like silver or chrome can bounce light back onto the subject from unconventional angles, producing unique highlights that add depth.
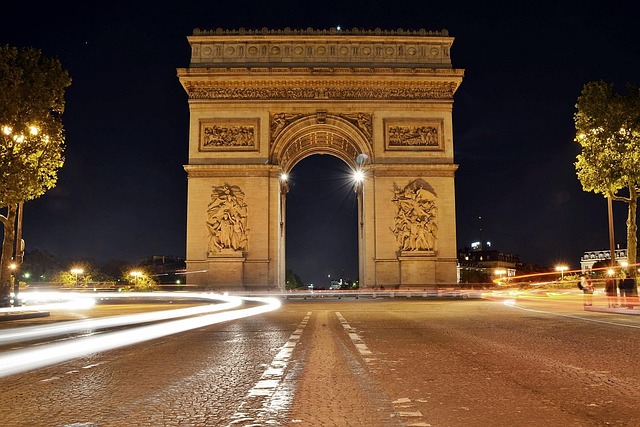
- Time‑Based Light Capture: Slow shutter speeds with changing light conditions can record motion blur, light trails, or the transition from day to night. The resulting images often embody a narrative that moves beyond the static frame.
- High Dynamic Range (HDR) Light Blending: By capturing multiple exposures and blending them in post‑processing, you preserve detail across extremes of light and shadow, allowing you to recreate scenes that were otherwise impossible to capture in a single frame.
Practical Workflow: From Planning to Execution
Excellent light design is as much about preparation as it is about execution. Follow this streamlined workflow to ensure consistent results in any shooting environment.
- Assess the Environment: Identify natural light sources, existing reflections, and ambient color. Note the time of day and how light will shift during your shoot.
- Set Your Goal: Define the mood, message, and visual style you aim to achieve. This decision will guide your lighting choices.
- Choose Equipment: Based on your goal, select modifiers, lights, and filters that best meet your needs.
- Arrange Lights: Position key lights, fill lights, and backlights to create the desired depth and balance. Use a light meter or histogram to gauge exposure.
- Test and Adjust: Take test shots, review histograms, and adjust intensity or direction as needed. Small tweaks can make significant differences.
- Capture: Shoot with confidence, knowing that your lighting framework supports your creative vision.
- Post‑Processing: Fine‑tune exposure, contrast, and color balance. Light design often extends into editing, where you can accentuate highlights or deepen shadows to reinforce the narrative.
Common Pitfalls and How to Avoid Them
Even seasoned photographers can fall into recurring mistakes that undermine their light design efforts. Here are some frequent blunders and strategies for prevention.
- Overexposure from Strong Lights: High‑intensity lights can wash out detail. Use a diffuser or lower the power output, and double‑check exposure settings.
- Uneven Lighting on the Subject: When a single light source creates too much contrast, consider adding a fill light or a reflector to soften shadows.
- Ignoring Color Temperature: Mixing lights of differing temperatures can lead to color casts. Use gels or a color temperature meter to keep your lighting consistent.
- Neglecting Ambient Light: Ambient light can compete with artificial sources. Block or capture it deliberately to maintain control.
- Forgetting Lens Effects: Lens flare, vignetting, and other optical artifacts can alter perceived light. Be mindful of lens hood usage and position of light sources relative to the camera.
Lighting in Different Genres: A Quick Reference
Each photography genre benefits from tailored lighting strategies. Use this quick reference to align your light design with the demands of each style.
- Portrait: Soft, diffused key light with a reflector; focus on flattering skin tones.
- Landscape: Emphasize natural light; use reflectors or flags to control harsh midday sun.
- Product: Multi‑source, balanced lighting; minimize reflections and shadows with diffusers.
- Macro: Controlled, directional light to highlight fine details; small light sources keep depth of field intact.
- Fashion: Bold, creative lighting with color gels; often combines studio and natural light for dramatic effects.
- Event: Quick setups using portable lights; adapt to changing ambient conditions.
Future Trends in Light Design and Camera Optics
The convergence of technology and creativity is reshaping light design. Emerging tools and techniques promise to open new avenues for photographers.
- Smart Lighting Systems: LED panels that connect to smartphones or computers allow remote control of intensity and color temperature, enabling real‑time adjustments on the fly.
- Light‑Sensitive Camera Sensors: Improved low‑light performance reduces the need for high‑intensity lighting, letting photographers capture natural light with greater fidelity.
- Hybrid Imaging: Combining photographic and cinematic techniques, such as using camera‑mounted LED strips to produce light trails in a single exposure.
- AI‑Driven Light Planning: Software that analyzes scene geometry and suggests optimal light placement, reducing trial‑and‑error.
- Virtual Light Sources in Post‑Processing: Advanced rendering engines can simulate light interactions, allowing photographers to “add” lights in the editing phase with realistic physics.
Conclusion: The Artful Fusion of Light and Optics
Mastering light design in photography is an evolving practice that blends technical precision with artistic intuition. By understanding how light behaves, selecting the right tools, and experimenting with both classic and avant‑garde techniques, photographers can elevate their images from mere snapshots to compelling visual narratives. Light is not merely a physical phenomenon; it is the medium through which we shape perception, mood, and meaning. As technology advances, the possibilities only grow, inviting each photographer to explore, innovate, and ultimately craft light that resonates with audiences worldwide.


