Nature photography invites us to capture the fleeting beauty of the natural world, translating light, color, and motion into lasting images. While composition, timing, and creative vision are often highlighted, the technical foundation—camera optics—remains the invisible hand that shapes every frame. By understanding the principles of lenses, focal lengths, apertures, and optical distortions, photographers can unlock the full potential of their equipment and bring the subtle drama of nature into sharper focus. This article delves into the layers of camera optics, guiding you through the science and artistry that underpin stunning nature images.
The Anatomy of a Lens
Every camera lens is a complex assembly of glass elements designed to bend light toward a sensor. The primary purpose is to focus light accurately, but secondary functions—correcting chromatic aberration, minimizing distortion, and controlling flare—are equally crucial for nature photography. Modern lenses often contain multiple elements made from specialized glass types, such as low-dispersion or aspheric elements, to reduce unwanted optical effects.
- Focal Length: Expressed in millimeters, this determines the angle of view and magnification. Short focal lengths (24–35 mm) capture sweeping landscapes, while longer focal lengths (100–200 mm) bring distant wildlife into view.
- Aperture: The f-number controls the size of the lens opening. A wide aperture (f/2.8) gathers more light and creates shallow depth of field, ideal for isolating subjects against soft backgrounds. A narrow aperture (f/16) increases depth of field, useful for full‑scene sharpness.
- Coatings: Modern lenses apply anti‑reflective coatings to reduce flare and ghosting, especially important when shooting backlit foliage or reflective water surfaces.
Focal Length and Perspective
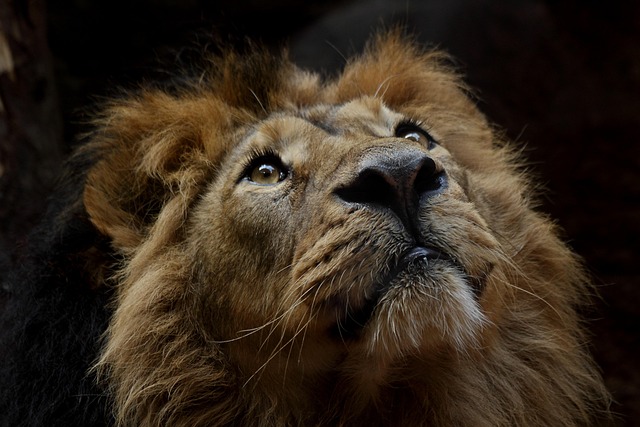
Perspective is a powerful tool in nature photography, and focal length is its primary lever. A wide‑angle lens compresses space less, revealing the vastness of a mountain range, while a telephoto lens stretches distance, creating a sense of intimacy with a distant bird perched on a branch. Understanding how focal length changes perceived depth helps photographers choose the right lens for each scene.
“A lens is merely a tool. The artist chooses how to use it.” – Unknown
Depth of Field: Layering the Scene
Depth of field (DoF) refers to the zone in a photograph that appears acceptably sharp. In nature photography, DoF is manipulated to guide the viewer’s eye. A shallow DoF isolates the subject—a dew‑laden spider in macro work—while a deep DoF ensures that both the foreground moss and background cliffs are crisp.
- Calculate DoF: Use an online DoF calculator or the formula: DoF = (2 × N × c × f²) / (f²), where N is f-number, c is circle of confusion, and f is focal length.
- Choose the right aperture: For wide landscapes, f/11 to f/16 gives maximum DoF. For portrait‑style wildlife shots, f/2.8 to f/5.6 creates a soft background.
- Focus distance matters: The closer the focus point to the camera, the narrower the DoF, especially at longer focal lengths.
Optical Aberrations and Their Mitigation
Even the best lenses exhibit imperfections—chromatic aberration, spherical aberration, and distortion. Each can subtly alter the appearance of a nature scene. Chromatic aberration manifests as color fringing around high‑contrast edges, such as a white cloud against a blue sky. Spherical aberration reduces overall sharpness, while barrel or pincushion distortion warps straight lines.
Mitigation strategies include:
- Using high‑quality prime lenses, which typically have fewer elements and better optical performance.
- Employing lens correction profiles in post‑processing software.
- Choosing lenses with aspheric elements and low‑dispersion glass.
Sensor Interaction: Crop Factor and Field of View
Camera sensor size directly affects field of view. A full‑frame sensor captures the same field of view as the lens, whereas APS‑C or APS‑S sensors apply a crop factor (typically 1.5× or 1.6×), effectively narrowing the angle of view. This is vital for nature photographers using smaller cameras; a 200‑mm lens on an APS‑C sensor behaves like a 300‑mm lens on a full‑frame, offering greater reach for distant subjects.
The Role of Filters in Enhancing Natural Light
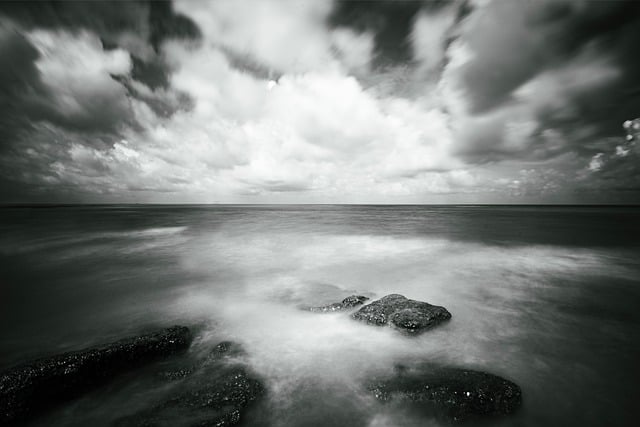
Filters can be powerful allies when shooting nature scenes. A neutral density (ND) filter reduces light entry, enabling slower shutter speeds to capture motion blur in waterfalls or cloud movement. A polarizing filter reduces glare on leaves and water surfaces and enhances sky contrast. Color filters—such as red or orange—are used in low‑light situations to balance color temperature and maintain natural hues.
Practical Lens Selection: Matching Gear to Goals
Choosing the right lens depends on the specific nature subject. Below is a quick reference guide:
- Landscape: Wide‑angle lenses (14–35 mm) or standard zooms (24–70 mm) on full‑frame bodies.
- Wildlife: Telephoto zooms (70–300 mm) or prime telephoto lenses (200–400 mm) for closer shots.
- Macro: Dedicated macro lenses (100–200 mm) with close‑focus capabilities.
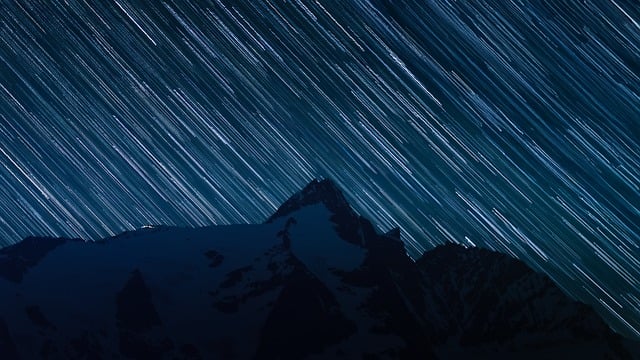
- Astrophotography: Fast wide‑angle lenses (10–20 mm, f/2.8 or faster) to capture star fields.
Lens Maintenance: Keeping Your Optics Clean
Dust, fingerprints, and environmental grime can degrade image quality. Use a microfiber cloth, lens cleaning solution, and a blower brush to gently remove particles. Avoid touching the glass directly; always hold the lens by the barrel. When traveling in harsh conditions—such as sand dunes or salt spray—consider a protective filter or lens hood to shield the front element.
Post‑Processing: Leveraging Optical Data
Modern cameras embed lens metadata—such as focal length, aperture, and distortion coefficients—into image files. This data assists in lens correction during post‑processing. Software like Lightroom or Capture One can automatically remove barrel or pincushion distortion, correct vignetting, and sharpen images based on lens characteristics. Understanding your gear’s optical profile ensures that your post‑production adjustments are accurate and consistent.
Creative Experimentation: Pushing Optical Boundaries
Nature photographers often push the limits of optics for artistic effect. Macro lenses reveal the hidden textures of a fern frond. Wide‑angle lenses exaggerate the curvature of a coastline. Telephoto lenses compress the perspective, making distant peaks appear closer. By experimenting with focal length, aperture, and focus distance, photographers can reinterpret familiar scenes, revealing new layers of meaning.
Conclusion: Mastering Optics for Natural Mastery
Camera optics form the backbone of nature photography. From the fundamental principles of lens construction to the nuanced manipulation of depth of field and optical aberrations, each layer of knowledge equips the photographer to translate the world’s beauty into compelling images. By pairing technical understanding with creative vision, you can transform ordinary scenes into extraordinary visual narratives, capturing the soul of nature with clarity and grace.