When photographers turn their digital images into physical prints, the process is more than a simple transfer from screen to paper. It is a culmination of decisions made during the capture of a moment, the choice of optical gear, and the final rendering onto a chosen medium. Each stage adds a layer of detail that, if handled correctly, can elevate a simple snapshot into a compelling visual narrative. The term “printing” in this context becomes a bridge between the virtual world of pixels and the tangible world of touch, scent, and weight.
Choosing the Right Camera Sensor for High‑Resolution Output
Before any optical consideration, the sensor determines the ceiling of detail a photographer can achieve. Full‑frame sensors with larger pixel sizes capture more light per pixel, reducing noise and allowing for higher resolution files without sacrificing dynamic range. Medium‑format cameras push this boundary even further, offering 50–70 megapixels that can be printed at astonishingly large scales while maintaining sharpness. The sensor’s architecture—back‑illuminated versus front‑illuminated—also affects the efficiency of light collection, especially in low‑light situations that can degrade a print’s clarity.
- Full‑frame sensors: 24–30 MP, balanced dynamic range.
- Medium‑format sensors: 50–70 MP, ideal for large wall art.
- Back‑illuminated designs: improved sensitivity, lower noise.
Lens Quality: The First Layer of Sharpness
Even the most advanced sensor cannot compensate for a sub‑par lens. Optical design, glass composition, and coating technology all play pivotal roles. Modern prime lenses often employ low‑dispersion (ED) glass to reduce chromatic aberration, while aspherical elements correct spherical distortion. Coatings like Nano‑Coat or Super‑NanoCoat minimize flare and ghosting, preserving contrast and color fidelity in the final print. Aperture choice also influences depth of field and diffraction; a well‑chosen focal length paired with a moderate aperture (e.g., f/5.6–f/8) typically offers the sweet spot between resolution and depth.
“A good lens is like a well‑tuned instrument; it brings out the true character of every subject.” – Anonymous Photographic Expert
Managing ISO and Noise for Clean Prints
ISO settings dictate how the sensor interprets light. Higher ISO amplifies the signal but also the noise floor. For prints that require flawless detail, photographers often stay within ISO 100–400 when lighting permits. In low‑light scenes, multi‑exposure techniques or in‑camera noise reduction can preserve detail, but the best practice remains to shoot at the lowest ISO that still delivers an adequate exposure. Once the image is captured, a careful noise‑reduction workflow—preferably using RAW processors—can clean up any remaining artifacts without erasing fine texture.
- Keep ISO as low as possible.
- Use RAW format to retain maximum data.
- Apply selective noise reduction in post.
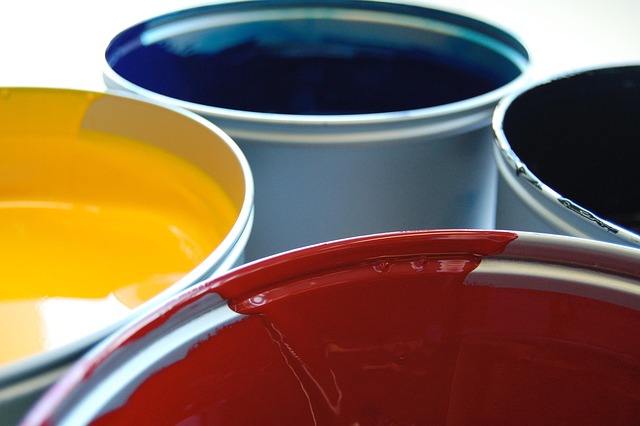
Color Management: From Camera to Print
The fidelity of color reproduction is crucial for a successful print. Cameras produce a device profile that can be calibrated against a reference chart, ensuring that the color space (sRGB, Adobe RGB, or ProPhoto RGB) matches the printing workflow. When printing on specialty paper or with UV inks, the chosen color profile must account for the medium’s spectral response. Calibration tools—such as colorimeters—can help maintain consistency across devices, so the hues captured by the camera translate accurately onto paper.
Choosing Paper and Ink: The Final Layers
Print quality is significantly influenced by the type of paper and ink. Giclée printing, which uses high‑resolution inkjet technology, can produce prints with a dynamic range and color depth that rival professional film prints. Matte papers reduce glare and emphasize texture, whereas glossy surfaces bring out saturation but may introduce reflections. Specialty papers—such as canvas, metallic, or photographic paper with a fine-grain finish—offer unique tactile experiences. Ink choice (pigment versus dye) affects longevity and color stability; pigment inks tend to resist fading and are often preferred for archival prints.
Print Scaling and Resolution Considerations
When scaling an image for printing, the target DPI (dots per inch) is essential. Fine art prints typically use 300 DPI for optimal sharpness, while large wall art can often be printed at 150 DPI without perceptible loss of detail due to viewing distance. Photographers must ensure that their file’s pixel dimensions exceed the print size multiplied by the desired DPI. For instance, a 120 mm × 90 mm print at 300 DPI requires a file of at least 1417 × 1067 pixels. Oversampling—adding extra pixels through interpolation—can smooth edges but may also introduce blur if overused.
Post‑Processing: Adding the Final Touches
Digital editing is often the last, yet most critical, layer before printing. Color balance, exposure, contrast, and sharpening must be tailored to the chosen medium. High‑pass sharpening, combined with mask-based techniques, allows photographers to enhance edges without causing halos. Soft‑focus or vignetting can be added selectively to guide the viewer’s eye. Additionally, adjusting the tonal range to match the printer’s capabilities ensures that highlights and shadows are faithfully reproduced, preventing unwanted clipping or loss of detail.
Printing Techniques and Their Impact
Beyond the traditional inkjet, other printing methods can impart distinct qualities to a photograph:
- Litho printing: Uses a gelatin relief to transfer ink, offering a tactile, matte finish ideal for high‑resolution images.
- Platinum‑silver printing: Provides an archival, tonal range with a unique organic look, though it requires careful chemical handling.
- Digital textile printing: Allows photographs to be printed on fabrics, opening new avenues for mixed‑media projects.
Quality Assurance and Archiving
Once the print is produced, a rigorous inspection ensures that it meets the photographer’s standards. Checking for color shifts, ghosting, or physical defects like streaks safeguards the final product. For archival purposes, storing prints in climate‑controlled environments—stable temperature, low humidity, and protection from UV light—extends their lifespan. Digitally, maintaining a backup archive of the master RAW files and final print files preserves the work for future generations and potential re‑prints.
Conclusion: The Layers that Define Print Quality
Printing a high‑resolution photograph is a layered process that starts with the careful selection of sensor and optics, moves through meticulous exposure and color management, and culminates in the choice of paper, ink, and printing technology. Each layer—sensor, lens, ISO, color profile, paper, ink, post‑processing, and printing method—contributes to the final outcome. By treating each step with deliberate attention, photographers can ensure that the transition from digital capture to tangible print preserves the integrity of their vision, allowing viewers to experience the depth, texture, and emotion of the captured moment in a form that endures both time and touch.